Clay crafts have captivated DIY enthusiasts for generations, and making fridge magnets with clay is one of the most enjoyable and accessible projects you can tackle. Whether you are a seasoned sculptor or a complete beginner, clay fridge magnets allow you to transform simple materials into charming, functional art pieces that personalize your kitchen and make memorable handmade gifts.
\n\n
This in-depth guide will teach you everything you need to know about how to make fridge magnets with clay, from selecting the right type of clay to baking, painting, and sealing your creations. We will also introduce you to professional custom metal fridge magnet manufacturing options for when you need large quantities or premium quality beyond what home crafting can achieve.
\n\n
Why Clay Is Perfect for Fridge Magnets
\n\n
Clay is an incredibly versatile medium for crafting fridge magnets for several compelling reasons:
\n\n
- \n
- Easy to mold: Even beginners can shape clay into attractive designs with minimal practice.
- Versatile finishes: Paint, glaze, or leave natural for different aesthetic effects.
- Durable when cured: Properly baked polymer clay or air-dry clay becomes hard and long-lasting.
- Lightweight: Clay magnets are not overly heavy, making them easy to attach with standard magnetic strips.
- Endless design options: From miniature food to abstract shapes, clay accommodates any creative vision.
\n
\n
\n
\n
\n
\n\n
Types of Clay for Making Fridge Magnets
\n\n
Choosing the right clay is essential for achieving the look and durability you want. Here are the most popular options:
\n\n
Polymer Clay
\n
Polymer clay is the top choice for most crafters. Brands like Sculpey and Fimo offer vibrant colors that stay true after baking. Polymer clay hardens in a standard home oven at low temperatures (usually 265-275°F) and produces strong, durable magnets.
\n\n
Air-Dry Clay
\n
Air-dry clay is ideal if you do not have access to an oven. It dries naturally within 24-48 hours and can be painted once fully hardened. However, it is slightly more fragile than polymer clay and benefits from a protective sealant.
\n\n
Modeling Clay (Oil-Based)
\n
Oil-based modeling clay never fully hardens, so it is generally not suitable for permanent fridge magnets unless you create a mold and cast it in another material.
\n\n
Cold Porcelain Clay
\n
This homemade clay mixture (cornstarch and glue-based) dries to a smooth, porcelain-like finish. It is lightweight and excellent for delicate designs but requires careful handling.
\n\n
Essential Tools and Materials
\n\n
Before you begin crafting, gather the following supplies:
\n\n
- \n
- Polymer or air-dry clay in your chosen colors
- Strong craft glue or epoxy
- Magnetic strips or neodymium disc magnets
- Acrylic paints and fine brushes
- Clay sculpting tools or household alternatives (toothpicks, butter knives)
- Rolling pin or pasta machine for even thickness
- Clear varnish or resin sealant
- Oven (for polymer clay) or flat drying surface (for air-dry clay)
\n
\n
\n
\n
\n
\n
\n
\n
\n\n
Step-by-Step Guide: How to Make Fridge Magnets with Clay
\n\n
Step 1: Plan Your Design
\n
Sketch your ideas or browse for inspiration. Popular clay magnet designs include miniature donuts, fruits, animals, flowers, stars, hearts, letters, and personalized name plaques.
\n\n
Step 2: Condition the Clay
\n
Knead your clay thoroughly until it becomes soft and pliable. This is especially important for polymer clay, which can be firm straight from the package. Well-conditioned clay is easier to shape and less likely to crack.
\n\n
Step 3: Shape Your Magnets
\n
Roll the clay to an even thickness of about 1/4 inch. Use cookie cutters, freehand sculpting, or molds to create your shapes. For detailed designs, build components separately and gently press them together.
\n\n
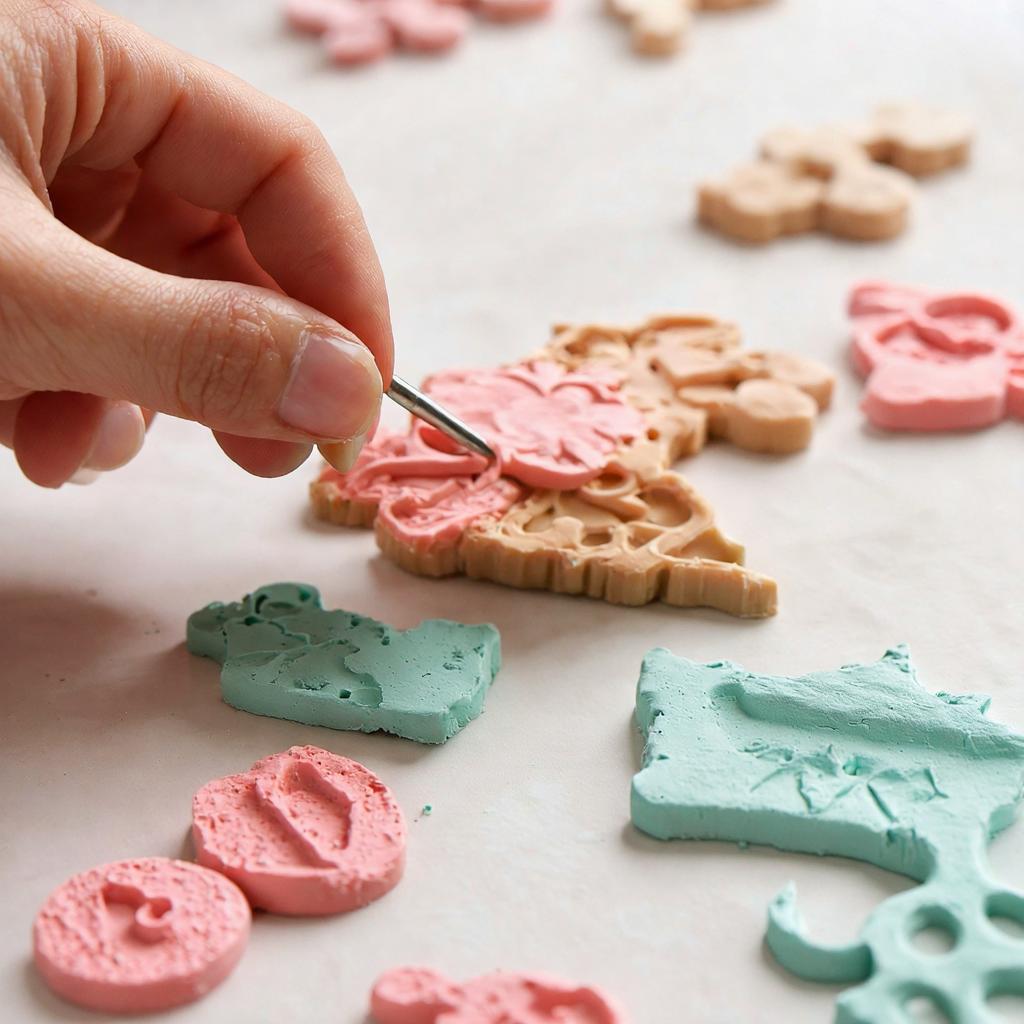
Step 4: Add Texture and Details
\n
Use sculpting tools to add texture. Create frosting swirls on donut magnets, leaf veins on flower magnets, or facial features on animal magnets. This is where your creativity truly shines.
\n\n
Step 5: Insert Eye Screws (Optional)
\n
If your design accommodates it, insert a small eye screw before baking. This creates a more secure anchor for attaching the magnet after curing.
\n\n
Step 6: Bake or Dry the Clay
\n
For polymer clay, bake on a parchment-lined baking sheet according to the manufacturer\’s instructions. Avoid overheating, as this can cause discoloration or burning. For air-dry clay, place shapes on a flat surface in a well-ventilated area and allow 24-48 hours to dry completely.
\n\n
Step 7: Paint and Decorate
\n
Once cooled or dried, paint your magnets with acrylic paints. Apply multiple thin layers for even coverage. Add details like sprinkles, faces, or metallic accents. Allow paint to dry fully before sealing.
\n\n
Step 8: Seal for Protection
\n
Apply a clear varnish, Mod Podge, or epoxy resin to protect the paint and clay from moisture and chipping. A glossy finish mimics the look of glazed ceramics, while matte varnish offers a more natural appearance.
\n\n
Step 9: Attach the Magnets
\n
Cut magnetic strips to size or use neodymium disc magnets. Attach to the back of each clay piece using strong craft glue or two-part epoxy. Ensure the magnet is centered and fully bonded. Allow the adhesive to cure overnight before use.
\n\n
Clay Fridge Magnet Design Inspiration
\n\n
Need ideas for your next clay magnet project? Consider these popular themes:
\n\n
- \n
- Food Miniatures: Tiny pizzas, donuts, sushi rolls, and coffee cups are universally charming.
- Nature Themes: Succulents, cacti, mushrooms, and flowers bring organic beauty to your fridge.
- Animal Characters: Cats, dogs, pandas, and owls appeal to pet lovers.
- Seasonal Designs: Pumpkins for fall, snowmen for winter, and flowers for spring.
- Monogram Letters: Personalized initials make excellent customized gifts.
- Travel Memories: Sculpt landmarks like the Eiffel Tower or local icons.
\n
\n
\n
\n
\n
\n
\n\n
Common Mistakes to Avoid
\n\n
Even simple projects have pitfalls. Here is what to watch out for:
\n\n
- \n
- Overbaking polymer clay: This causes browning and brittleness. Use an oven thermometer for accuracy.
- Skipping surface preparation: Dust and oils prevent paint and sealant from adhering properly.
- Using weak magnets: Thin magnetic strips may not hold heavier clay pieces securely.
- Applying paint too thickly: Thick paint cracks and dries unevenly. Build up thin layers instead.
- Rushing the curing process: Impatience leads to loose magnets and damaged finishes.
\n
\n
\n
\n
\n
\n\n
When to Upgrade to Professional Custom Metal Fridge Magnets
\n\n
Clay fridge magnets are wonderful for personal crafting and small gifts, but businesses, organizations, and event planners often need something more refined and scalable. When you require hundreds or thousands of identical, premium-quality magnets, professional manufacturing is the clear solution.
\n\n
Metal Crafts Pro is a B2B manufacturer specializing in custom metal fridge magnets crafted from zinc alloy, iron, brass, and stainless steel. Our advanced production capabilities include die-casting, stamping, soft enamel filling, hard enamel, offset printing, and laser engraving. We can replicate intricate logos, detailed artwork, and complex shapes with precision that hand-sculpted clay cannot match.
\n\n
Our metal fridge magnets are perfect for corporate branding, tourist souvenirs, commemorative events, promotional giveaways, and retail merchandise. Choose from a wide range of finishes including gold plating, nickel plating, antique bronze, black nickel, and full-color printing. Every magnet undergoes rigorous quality inspection to ensure it meets our exacting standards.
\n\n
Request a Free Quote for Custom Metal Magnets
\n\n
Frequently Asked Questions
\n\n
What type of clay is best for beginners making fridge magnets?
\n
Polymer clay is the best choice for beginners because it is easy to condition, comes in many colors, bakes in a home oven, and produces durable results.
\n\n
How do I prevent my clay magnets from breaking?
\n
Avoid making shapes too thin or with protruding fragile parts. Bake at the correct temperature, and always seal with a protective varnish or resin.
\n\n
Can I use air-dry clay for fridge magnets?
\n
Yes, air-dry clay works well but requires longer drying time and a good sealant. It is slightly more fragile than baked polymer clay.
\n\n
What kind of paint should I use on clay magnets?
\n
Acrylic paint is the best option. It adheres well to clay, dries quickly, and offers vibrant colors that can be sealed for protection.
\n\n
How strong should the magnets be?
\n
For lightweight clay pieces, adhesive magnetic strips suffice. For thicker or heavier designs, use neodymium disc magnets rated for at least 2-3 pounds of pull force.
\n\n
Conclusion
\n\n
Now that you know how to make fridge magnets with clay, you have everything needed to start creating beautiful, personalized kitchen decor and handmade gifts. Clay is an incredibly forgiving and versatile medium that rewards creativity at every skill level. From simple shapes to intricate miniature sculptures, your imagination is the only limit.
\n\n
Whether you craft for fun, for profit, or for gifting, clay fridge magnets are a timeless project that never goes out of style. And when your needs grow beyond what home crafting can fulfill, remember that Metal Crafts Pro stands ready to manufacture professional-grade custom metal fridge magnets with the same attention to detail and creative passion you bring to your DIY projects. Contact us today to discover how we can bring your magnet designs to life at scale.

