When I first learned how to make a lanyard keychain, I was amazed by how fun and rewarding the process is. If you’re looking to add a personal touch to your keys or simply enjoy crafting, starting a lanyard keychain is a great way to do so. In this article,I’ll walk you through the steps of creating your own unique keychain that you can proudly show off. Let’s dive in and get started on this creative journey together.
Choosing the Right Materials for Your Lanyard keychain
When starting a lanyard keychain project, it’s essential to choose the right materials to ensure durability and longevity. The material you select can also affect the overall look and feel of your keychain, so it’s important to consider your preferences and needs. Here are some popular materials to consider:
- Nylon: Nylon lanyards are durable and come in a wide range of colors and patterns, making them a versatile choice for keychains.
– Polyester: Polyester lanyards are also sturdy and can be customized with logos or designs, perfect for promoting businesses or events.– Leather: For a more elegant look, leather lanyards are a stylish option that can add a touch of elegance to your keychain.
Step-by-Step Guide to Creating Your Own Lanyard Keychain
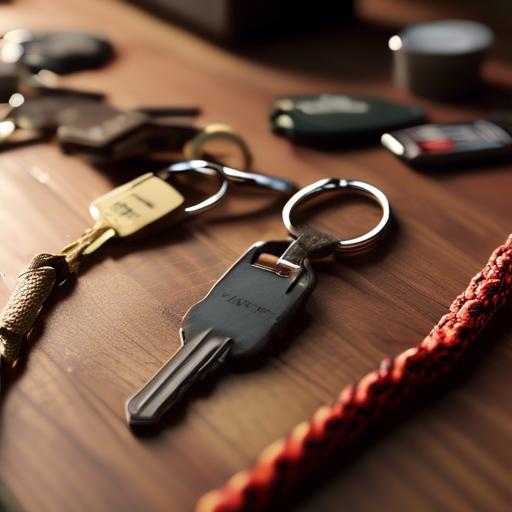
To begin creating your own lanyard keychain, first gather all the materials you will need. This includes colorful lanyard strings, keychain rings, scissors, and a clipboard to hold your work in place. Once you have all your supplies ready,you can start the creative process of making your custom keychain.
Next, choose the colors of lanyard strings you want to use for your keychain. Mix and match different colors to create a unique and eye-catching design. Than, follow a simple braiding pattern, such as the box stitch or cobra stitch, to weave the lanyard strings together around the keychain ring.Be patient and careful as you braid, making sure each knot is secure. Once you reach your desired length, tie off the ends and trim any excess string. Your personalized lanyard keychain is now ready to use or gift to a friend.
Tips and Tricks for Adding Personalized Touches to Your Keychain
To create a personalized lanyard keychain, you can start by selecting a variety of colorful and unique beads to add visual interest. Incorporate different shapes and sizes to make your keychain truly stand out.Consider adding alphabet beads to spell out your name or a special word that holds meaning to you. You can also mix in charms that represent your hobbies or interests to give your keychain a personal touch.
Once you have gathered your materials, begin by threading a lobster clasp onto a piece of nylon cord. Secure the clasp in place by tying a knot at the end of the cord.Next, start stringing your beads onto the cord in a pattern that you find aesthetically pleasing. Mix and match colors and textures to create a visually stunning keychain that reflects your unique style. finish off your keychain by tying another knot at the end to secure the beads in place, and voila – you have a beautiful and personalized lanyard keychain to add to your collection. Let your creativity shine through in this DIY project, and have fun designing a keychain that is as unique as you are!
Exploring Different Knots and Techniques for a sturdy and Stylish Keychain
For those looking to add a personal touch to their keychain, mastering the art of creating lanyard keychains can be a fun and rewarding experience. By exploring different knots and techniques, you can craft a sturdy and stylish keychain that reflects your unique personality.
To start creating your own lanyard keychain, you’ll need a few basic supplies such as paracord, key rings, and scissors. One popular knot to use is the cobra knot, also known as the square knot. This knot creates a tight and decorative pattern that adds both strength and visual interest to your keychain. Another knot to experiment with is the diamond knot, which not only looks intricate but also provides extra security to keep your keys in place. With a bit of practice, you’ll soon be able to customize your keychain with different colors and patterns to suit your individual style.
| Knot | Technique |
|---|---|
| Cobra knot | Create a square knot design |
| Diamond Knot | Provides extra security |
Q&A
Q: How do I begin making a lanyard keychain?
A: Starting a lanyard keychain is simple! All you need is some lanyard cord and a key ring.
Q: What type of cord should I use?
A: You can use any type of lanyard cord you prefer, such as nylon, cotton, or paracord. Just make sure it’s sturdy enough to hold your keys.
Q: Where can I find materials for making a lanyard keychain?
A: You can find lanyard cord and key rings at most craft stores or online retailers.
Q: Are there any special techniques I need to know?
A: The most common knot used for lanyard keychains is the square knot or the cobra knot. There are plenty of tutorials online to help you learn thes techniques.Q: How long does it take to make a lanyard keychain?
A: The time it takes to make a lanyard keychain depends on the complexity of the design you choose. Simple designs may only take a few minutes, while more intricate patterns could take longer.
Q: Can I personalize my lanyard keychain?
A: Absolutely! You can add beads,charms,or even embroidery to personalize your lanyard keychain and make it unique to you.
Q: Why should I make a lanyard keychain?
A: Making your own lanyard keychain can be a fun and creative way to showcase your personal style while keeping your keys organized and easily accessible. Plus, it makes a great handmade gift for friends and family.
Future Outlook
I hope this article has inspired you to start making your own lanyard keychain! Remember, practice makes perfect, so don’t get discouraged if your first few attempts don’t turn out exactly how you imagined. Just have fun with it and let your creativity shine through. And who knows, maybe you’ll become a lanyard keychain making pro in no time! Good luck, and happy crafting!

