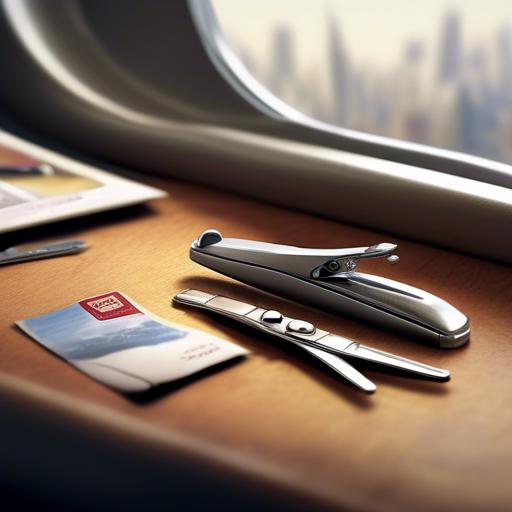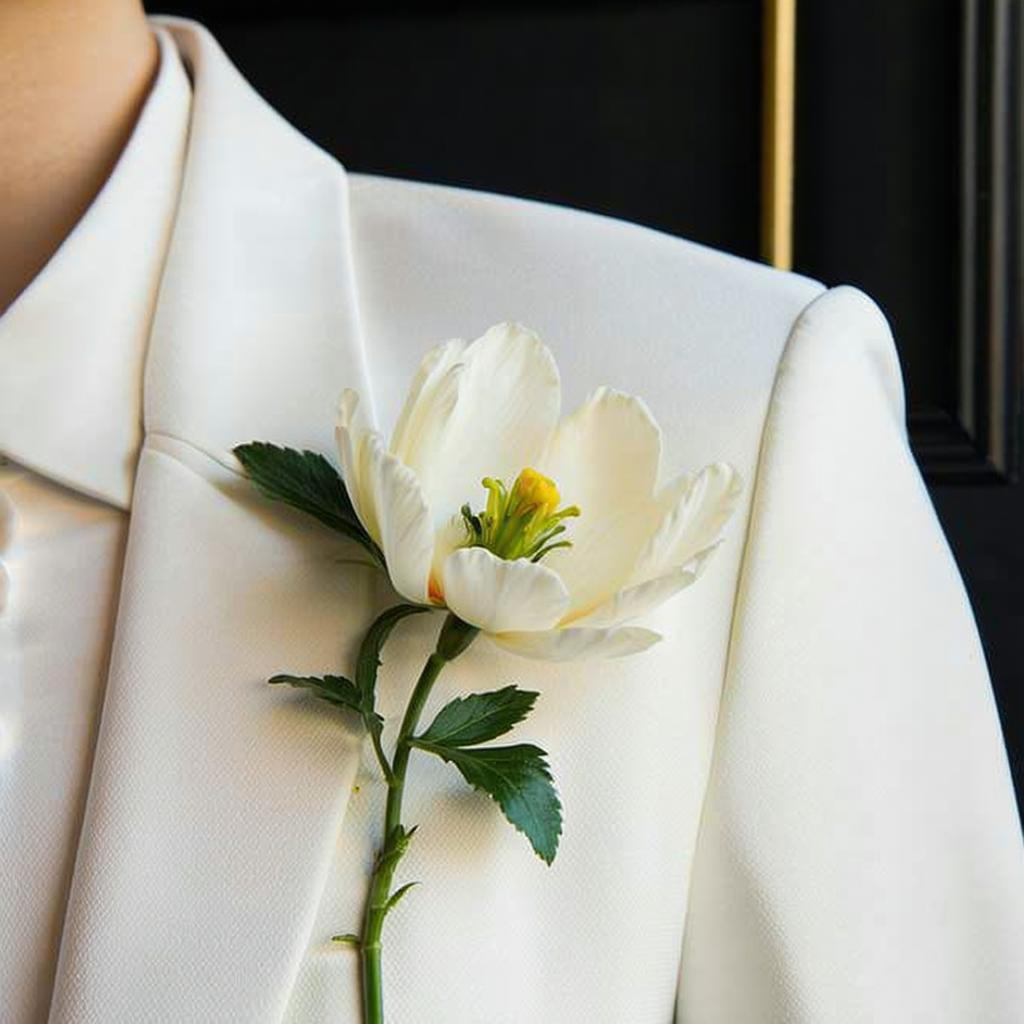
Fresh flowers add unmatched elegance and natural beauty to wedding attire, transforming a well-tailored suit into a romantic statement. Yet the practical task of attaching a boutonniere or floral accent to a lapel can intimidate even experienced dressers. A poorly secured flower droops, wilts, or falls off at the most inopportune moments. A properly pinned boutonniere, by contrast, remains crisp and radiant throughout the ceremony, photographs, and reception. At Metal Crafts Pro, while our primary expertise lies in manufacturing custom metal lapel pins and crafts for B2B clients, we deeply understand the mechanics of lapel adornment. This guide provides comprehensive instructions on how to pin a flower on a lapel, ensuring your wedding day look remains flawless from the first photograph to the final dance.
Selecting the Perfect Boutonniere Flower
Before considering placement or pinning technique, begin with the right flower selection. Not all blooms are suitable for lapel wear. Ideal boutonniere flowers possess sturdy stems, resilient petals, and moderate size. Roses remain the classic choice due to their structural strength, layered petals that resist bruising, and timeless romantic symbolism. Miniature calla lilies offer sleek, modern elegance with firm stems that pin securely. Ranunculus provides lush, garden-inspired texture with surprisingly durable blooms. For rustic or outdoor weddings, succulents, hypericum berries, and spray roses create charming, long-lasting arrangements.
Avoid flowers with fragile, tissue-thin petals such as peonies, gardenias, or certain orchid varieties unless they are professionally reinforced. Delicate blooms may brown at the edges within hours and collapse under the pressure of pinning. Similarly, steer clear of overly large flowers that overpower the lapel or create awkward bulges beneath the jacket fabric. The boutonniere should complement your attire, not dominate it. A general guideline is to keep the bloom diameter between one and two inches, with the overall arrangement including foliage not exceeding three inches in height.
Coordinate your boutonniere with the bridal bouquet, bridesmaid flowers, and overall wedding palette. Florists typically design boutonnieres as miniature counterparts to larger arrangements, using matching varieties and accent greenery. If you are assembling your own boutonnieres, select flowers the day before the wedding, hydrate them thoroughly, and store them refrigerated in sealed containers until the morning of the ceremony.
Boutonniere Selection Checklist
Before finalizing your wedding flowers, confirm that your boutonnieres meet these essential criteria:
- Stem length of one to two inches after wiring and trimming for easy pinning.
- Bloom diameter between one and two inches for proportional balance on standard lapels.
- Sturdy petals that resist bruising during hugs, dancing, and movement.
- Colors that complement rather than exactly match the bridal bouquet.
- Seasonal availability to ensure freshness, reasonable pricing, and vibrant color.
- Hypoallergenic properties if any wedding party members have pollen sensitivities.
- Backup plan for outdoor weddings in extreme heat, humidity, or unpredictable weather.
- Professional wiring or taping to create a secure, pin-friendly stem.
Boutonniere Placement Fundamentals
Traditional boutonniere placement follows the same left-lapel rule as lapel pins. Position the flower on the left lapel, roughly aligned with the heart. The exact placement depends on your jacket style. For notch lapels, place the boutonniere slightly above the notch point, angling the stem to follow the lapel’s natural slope. For peak lapels, position the flower lower on the lapel so the stem runs parallel to the upward sweep of the peak. On shawl collars, which feature continuous rounded edges, center the boutonniere on the left side where the collar meets the shoulder seam.
If your jacket has a functional boutonniere buttonhole on the left lapel, you have two elegant options. The first method involves inserting the stem directly through the buttonhole from the front to the back, then securing it with a hidden pin on the reverse side. This technique conceals all mechanics and creates a floating effect. The second method places the boutonniere just below the buttonhole, pinning it through the lapel fabric itself while leaving the buttonhole empty or adorned with a secondary accent. Both approaches are correct; the choice depends on stem thickness and personal preference.
For jackets without a buttonhole, you must pin through the lapel fabric directly. Select a location in the upper third of the lapel, avoiding seams, edges, and heavily padded areas where the pin may struggle to penetrate or may create visible dimpling. Hold the boutonniere against the lapel and assess its position in a mirror before committing to the pin. Ensure the bloom faces slightly upward and outward toward the viewer rather than tilting inward toward the chest.
Wiring and Stem Preparation
Professional florists nearly always wire boutonniere stems to provide structural support and create a slender, pin-friendly shaft. If you receive a wired boutonniere from your florist, the hard work is already done. If you are creating your own, learning proper wiring technique is essential.
Begin by cutting the flower stem to approximately two inches in length. Insert a twenty-two-gauge floral wire through the calyx, the green base of the bloom, pushing it horizontally through the stem tissue until equal lengths protrude from both sides. Bend both wire ends downward parallel to the stem and wrap them tightly with floral tape, stretching the tape as you wind to activate its adhesive properties. Continue wrapping down the stem and wires until you create a single, smooth, tapered shaft approximately one-eighth inch in diameter. This wrapped stem is now sturdy enough to withstand pinning without crushing or splitting.
For heavy or multi-flower boutonnieres, additional wiring may be necessary. Wrap individual stems first, then bundle them together with a second layer of floral tape. Some florists insert a second support wire vertically through the center of the arrangement for extra rigidity. If your boutonniere includes decorative elements such as feathers, brooches, or metal accents, ensure these are securely fastened to the wired stem and will not detach during wear.
Securing Techniques for Different Fabrics
The method you use to pin a boutonniere depends on the fabric and construction of your jacket. Understanding these distinctions prevents damage and ensures reliable attachment.
Wool and Heavyweight Fabrics
Wool suiting, tweed, and flannel provide ideal surfaces for pinning flowers. The dense, resilient weave holds pins securely without visible damage. Use a standard straight pin with a pearl or decorative head for aesthetic appeal. Pierce the lapel from the front, catching the wrapped stem against the fabric, then push the pin back out through the lapel to create a hidden stitch effect. The pin head remains visible on the front, acting as a decorative element, while the sharp end is concealed behind the lapel. Alternatively, insert the pin from behind the lapel, through the stem, and back through the lapel for completely invisible attachment.
Silk and Delicate Fabrics
Silk, satin, and lightweight linen require gentler handling. These fabrics show puncture marks readily and may snag if pins are forced. Use the finest pins available, preferably silk pins or extra-sharp entomology pins with minimal shaft diameter. Insert the pin at a shallow angle rather than perpendicular to the fabric, distributing stress across more fibers. Consider placing a small piece of clear tape or fabric backing on the reverse side to reinforce the area and prevent the pin from tearing through. If the fabric is extremely delicate, ask your florist to create a magnetic boutonniere holder, a thin magnetic disc that clamps the stem against the lapel without piercing.
Double-Breasted and Constructed Jackets
Double-breasted jackets often feature heavier interfacing and canvas layers that can resist standard pins. If you encounter resistance, do not force the pin, as you may damage internal structure or create an unsightly outer dimple. Instead, use a longer, sturdier corsage pin that can penetrate all layers cleanly. Position the boutonniere on the left lapel that folds over the front, not the under-lapel that sits beneath. The top lapel offers easier access and better visibility.
Using Boutonniere Pins and Holders
Beyond traditional straight pins, several specialized tools exist to make boutonniere attachment easier and more secure. Boutonniere pins, sometimes called lapel pins or stick pins, feature an ornamental head and a long straight shaft that passes through the lapel and stem. They are faster to insert than standard pins and add a decorative metallic accent. Choose a pin head that complements your wedding theme, whether vintage pearl, modern geometric, or floral motif.
Magnetic boutonniere holders represent the most fabric-friendly option. These devices consist of a small magnet embedded in a decorative disc and a matching magnet that attaches behind the lapel. The stem slides between the two magnets, clamping firmly without needles. Metal Crafts Pro manufactures custom magnetic lapel accessories for florists and wedding planners who demand both elegance and garment protection. Our magnetic holders can be customized with monograms, dates, or miniature logos, serving as keepsakes long after the flowers fade.
Elastic band holders offer another alternative. These small loops attach to the back of the lapel with a tiny safety pin, and the boutonniere stem slides through the loop. While less secure than magnetic or pinned methods, they work adequately for lightweight flowers and eliminate the risk of lapel puncture.
Timing, Longevity, and Day-Of Logistics
Timing is critical when pinning fresh flowers. Insert boutonnieres no more than two hours before the ceremony to prevent wilting. If the wedding occurs in hot, humid, or direct sunlight conditions, reduce this window to thirty minutes. Keep boutonnieres refrigerated in sealed containers with damp paper towels until the last possible moment. Once pinned, the body heat trapped between the jacket and shirt accelerates wilting, so delaying attachment preserves freshness.
Designate a reliable person, such as the best man, wedding coordinator, or stylist, to assist with boutonniere pinning. Self-pinning in a mirror is awkward and increases the risk of misalignment or fabric damage. Provide your assistant with clear instructions and practice the pinning technique during the rehearsal if possible. For wedding parties with multiple groomsmen, assign one experienced person to pin all boutonnieres uniformly, ensuring consistent height and angle across the group.
Have backup supplies on hand including extra pins, floral tape, and a small misting bottle of water. If a boutonniere begins to droop during the reception, a quick misting can temporarily revive wilted petals. For outdoor summer weddings, consider substituting hardy silk or preserved flowers that withstand heat without wilting. Many couples today opt for metal or resin flower replicas that look remarkably realistic and last forever as mementos.
Conclusion
Learning how to pin a flower on a lapel is an essential skill for weddings, proms, formal galas, and any occasion where fresh floral accents elevate your appearance. Success depends on selecting appropriate blooms, preparing sturdy wired stems, choosing the correct placement on the left lapel, and using pinning techniques suited to your garment fabric. With proper preparation and careful execution, your boutonniere will remain beautiful and secure throughout your special event.
Metal Crafts Pro brings the same precision and craftsmanship to custom metal accessories that florists bring to fresh arrangements. While we specialize in manufacturing premium custom lapel pins, badges, and metal crafts for B2B clients, our expertise in lapel mechanics and fastening technology informs everything we produce. Whether you need magnetic backings that protect delicate fabrics, locking mechanisms for active wear, or exquisitely detailed custom designs for corporate gifting, our team delivers unmatched quality and service.
Contact Metal Crafts Pro today to explore our custom manufacturing capabilities. From wedding keepsakes to corporate recognition programs, we create metal crafts that commemorate life’s most important moments. Request a Free Quote