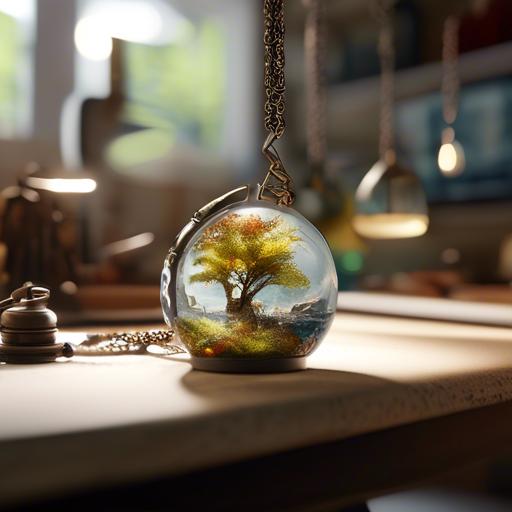
Ever wanted to add a unique touch to your jewelry collection? look no further than resin pendants! These stylish accessories are easy to make and allow you to showcase your creativity in a whole new way. Join me as I take you through the step-by-step process of creating your own resin pendants that are sure to make a statement. Let’s get crafting!
Materials and Tools needed for Creating Resin Pendants
For creating gorgeous resin pendants, you will need a variety of materials and tools to bring your creative vision to life. One essential item is resin,which serves as the main material for crafting the pendant. Additionally, you will need resin molds in diffrent shapes and sizes to shape the pendant according to your design.
To add color and flair to your resin pendant, consider using resin dyes or pigments to create stunning effects. You may also want to have mixing cups and stirring sticks handy for precise measurements and thorough mixing of the resin and colorants. Gloves are crucial to protect your hands during the crafting process, while a heat gun or torch can definitely help eliminate air bubbles for a smooth finish.
Step-by-Step Guide to Mixing Resin and Pouring into Molds
To begin creating your own stunning resin pendants, you will need to gather all the necessary materials and tools.Make sure you have resin, molds, mixing cups, stirring sticks, and any desired additives like glitter or pigment powders. Set up your workspace in a well-ventilated area and cover the surface with a protective layer to catch any spills or drips.
Next, follow these simple steps to mix the resin and pour it into the molds:
- Measure: Carefully measure equal parts of resin and hardener using separate, clean mixing cups.
- Mix: Slowly stir the two parts together for about 2-3 minutes, making sure to scrape the sides and bottom of the cup to ensure thorough mixing.
- Additives: If desired, mix in any additives such as glitter or pigment powders at this stage. Stir until evenly distributed.
- Pour: Gently pour the mixed resin into the molds, filling them up to the desired level. Be careful not to overfill to prevent spillage.
- Curing: Allow the resin to cure according to the manufacturer’s instructions before demolding the pendants.
- Finish: Once the pendants are fully cured, remove them from the molds and add any finishing touches such as sanding or drilling holes for jewelry findings. Happy crafting!
Tips for Adding Pigments, Glitters, and Embedding Objects
To achieve stunning resin pendants, its crucial to master the art of adding pigments, glitters, and embedding objects. Here are some tips to help you elevate your resin jewelry crafting game:
First, when adding pigments to your resin mixture, start small and gradually add more until you reach your desired color intensity.Mix the pigments thoroughly to avoid streaks or clumps in your final piece. Experiment with mixing different colors to create unique and eye-catching effects. Additionally, consider using translucent pigments for a more ethereal look in your pendants.
When incorporating glitters into your resin pendants, opt for fine or ultrafine glitters to prevent a gritty texture. Sprinkle the glitter into the resin mixture and stir gently to distribute it evenly.to achieve a mesmerizing sparkling effect, consider using iridescent or holographic glitters.For embedding objects such as dried flowers or charms,arrange them carefully in your mold before pouring the resin to ensure they are showcased effectively in the finished piece.
Curing, Removing from Molds, and finishing Touches
To cure resin pendants, you will need to let them sit undisturbed in a warm, dry place for at least 24 hours. This allows the resin to fully harden and set. Once cured, carefully remove the pendants from their molds by gently twisting or flexing the molds to release the resin.Be patient and take your time to avoid damaging the pendants.
After removing the pendants from the molds, you can add finishing touches to make them truly unique. Consider sanding any rough edges with fine-grit sandpaper for a smooth finish. You can also drill holes for attaching findings or embellish the pendants with glitter, paint, or other decorative elements. Have fun experimenting with different techniques to create one-of-a-kind resin pendants that reflect your personal style.
Q&A
Q: How do you make resin pendants?
A: Making resin pendants is a fun and creative way to express yourself through jewelry-making.
Q: What materials do I need to make resin pendants?
A: To make resin pendants, you will need resin, a silicone mold, pigment dyes, mixing cups and sticks, and any additional decorations like glitter, dried flowers, or beads.
Q: How do I mix the resin?
A: To mix the resin, simply follow the manufacturer’s instructions. Typically, you will need to mix equal parts of resin and hardener in a mixing cup until well combined.
Q: How do I add color to the resin?
A: You can add pigment dyes to the resin mixture to create your desired color. Mix the dye thoroughly into the resin before pouring it into the mold.Q: Can I add embellishments to the resin pendants?
A: Yes, you can add embellishments like glitter, dried flowers, or beads to the resin pendants before they fully cure.Simply place these decorations into the mold before pouring in the resin.
Q: How long does it take for the resin pendants to cure?
A: The curing time for resin pendants can vary depending on the type of resin used. Typically, it can take anywhere from 24 to 48 hours for the resin to fully cure and harden.
Q: How do I remove the resin pendants from the mold?
A: Once the resin has fully cured, carefully pop the resin pendants out of the silicone mold. If they are stuck, you can gently bend the mold to release the pendants.
Q: How can I turn my resin pendants into wearable jewelry?
A: You can easily turn your resin pendants into wearable jewelry by attaching a jump ring to the pendant and adding a chain or cord. You can also add a coat of resin to seal and protect the pendant.
Q: Can I personalize my resin pendants?
A: absolutely! You can personalize your resin pendants by adding inclusions like photos, initials, or small trinkets.The possibilities are endless when it comes to creating unique and one-of-a-kind resin pendants.
Insights and Conclusions
As we come to the end of this tutorial on how to make resin pendants, I hope you feel inspired and ready to get crafting. Remember, the possibilities are endless with resin art, so don’t be afraid to experiment and create unique pieces that reflect your own personal style. Whether your a seasoned crafter or a beginner looking to try something new, making resin pendants is a fun and rewarding way to unleash your creativity. So grab your supplies and start creating beautiful jewelry that you can proudly wear or gift to others. Happy crafting!


