Hey there, fellow paracord enthusiasts! Today, I’m excited to share with you a step-by-step guide on how to make your very own paracord keychain. As someone who has spent countless hours creating unique paracord gifts and accessories, I can tell you that this project is both fun and rewarding. Whether you’re a beginner looking to learn a new skill or an experienced crafter simply looking for a new project, making a paracord keychain is a great way to unleash your creativity. So grab your supplies and let’s get started!
Selecting the Right Paracord for Your Keychain
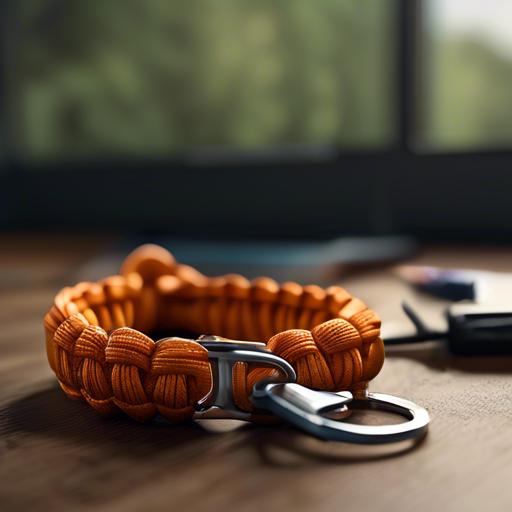
To make a paracord keychain, the first step is selecting the right type of paracord. 550 paracord is a popular choice due to its strength and durability. Other options like microcord or nanocord can be used for a more delicate look. Consider the color and pattern of the paracord to match your personal style or to create a unique design.
Onc you have chosen the paracord, decide on the length needed for your keychain. Typically, a 6-8 foot length should be enough for a standard keychain. You can also add beads, charms, or knots to customize your keychain further.Follow online tutorials or guides to learn different weaving techniques like the cobra knot or king cobra knot to create your desired design.Experiment with different combinations to find the perfect paracord keychain that suits your taste.
essential Tools and Materials Needed
To create a paracord keychain, you will need a few essential tools and materials.These items are crucial for crafting a sturdy and durable keychain that will stand the test of time. Here is a list of what you will need:
- Paracord: The most vital material for making a paracord keychain is, of course, the paracord itself. Make sure to choose a high-quality,strong paracord in your desired color.
- Scissors: You will need a good pair of scissors to cut the paracord to the desired length. Make sure they are sharp enough to cleanly cut through the thick cord.
- Keychain ring: This will be the base of your keychain, so be sure to choose a sturdy keychain ring that can hold all of your keys securely.
- lighter: A lighter will be used to seal the ends of the paracord to prevent fraying. Make sure to use caution when using a lighter to avoid burns.
- Tape measure: To ensure your keychain is the perfect length, a tape measure will come in handy for precise measurements.
- Optional beads or charms: If you want to add a personal touch to your keychain, consider adding beads or charms to customize it to your liking.
Step-by-Step Guide to Crafting Your Paracord Keychain
Start by gathering all the materials you will need for this fun and creative craft project.You will need paracord, scissors, a key ring, and a lighter. Make sure you have a clean and spacious work area to lay out your materials before starting.
Next, follow these simple steps to create your very own paracord keychain. Begin by cutting your paracord to your desired length, keeping in mind that you will need at least a foot of cord for every inch of your finished keychain. Then fold the cord in half and loop it through the key ring. Take the loose ends of the cord and feed them through the loop created by folding the cord in half. Pull tight to secure the cord to the key ring. Repeat this process with different colored cords to create a unique and customized keychain that reflects your personal style.
Adding Personalized Touches to Your Creation
To add personalized touches to your paracord keychain, consider incorporating unique beads or charms that hold meaning to you. Whether it’s a favorite color, symbol, or miniature trinket, these additions can make your creation truly your own. You can also customize the length and design of the keychain to suit your preferences, whether you prefer a longer, looped style or a shorter, more compact option.
Another way to personalize your paracord keychain is by adding initials or a short quote using letter beads or a custom engraving. This small detail can add a personal touch and make the keychain a special gift for a loved one. Additionally, you can experiment with different knotting techniques or interweave multiple colors to create a visually striking and unique keychain that reflects your style and personality. With a little creativity and attention to detail, your paracord keychain can become a one-of-a-kind accessory that you’ll be proud to carry with you wherever you go.
Q&A
Q: How do you start making a paracord keychain?
A: To start making a paracord keychain, you will need a piece of paracord, a key ring, and scissors.Q: What is the best type of paracord to use for a keychain?
A: The best type of paracord to use for a keychain is 550 paracord, as it is durable and easy to work with.
Q: How do you tie the paracord to the key ring?
A: To tie the paracord to the key ring, simply fold the paracord in half, loop it through the key ring, and pull the ends through the loop.
Q: How do you create a knot for the keychain?
A: To create a knot for the keychain, start by making a loop with the paracord and then wrap the ends around the loop and through the hole created.
Q: Are there any specific designs or patterns you recommend for a paracord keychain?
A: Some popular designs for paracord keychains include cobra weave, fishtail weave, and diamond knot. Feel free to get creative and experiment with different patterns!
Q: Any tips for beginners who are just starting to make paracord keychains?
A: Practice makes perfect! Start with simple patterns and gradually work your way up to more intricate designs. Don’t be afraid to make mistakes, as they can be a great learning possibility.Just have fun and enjoy the process!
Wrapping Up
I hope this article has inspired you to get creative and make your own paracord keychain. Remember, the possibilities are endless with different colors and patterns to choose from.Have fun crafting and don’t forget to share your creations with others! Thank you for reading and happy crafting!

