As a lover of all things handmade and personalized, I’ve always had a soft spot for embroidered badges. ther’s just something special about adding a unique touch to clothing or accessories with a colorful,intricately stitched design.If you’re like me and want to learn how to make your own embroidered badges, you’ve come to the right place! In this article, I’ll take you through the step-by-step process of creating your own custom badges that are sure to make a statement. So, grab your materials and let’s start stitching!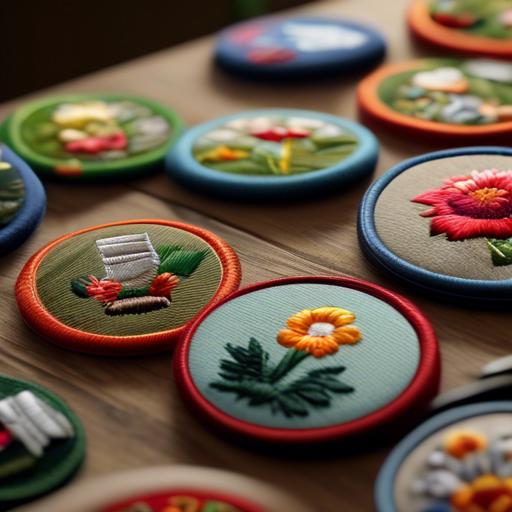
Getting Started with Embroidered Badges
To create your own embroidered badges, you’ll need a few key materials and tools. Start by gathering embroidery floss in various colors, embroidery needles, a hoop, fabric scissors, and a fabric pen or pencil. You’ll also need a piece of fabric to serve as the base for your badge. Choose a fabric that is durable and compatible with embroidery.
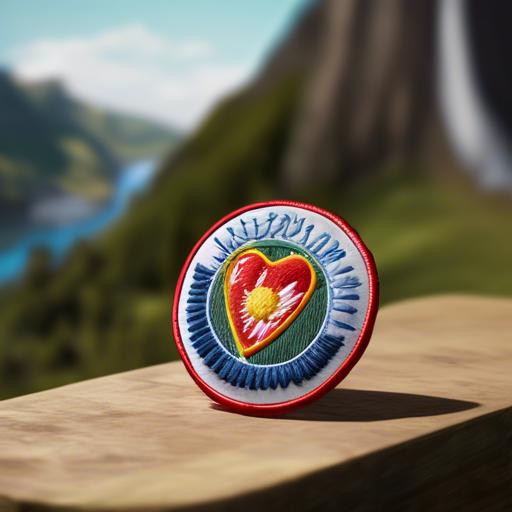
Next, choose a design for your badge. This could be a simple shape, a logo, or even a word or phrase. Use your fabric pen or pencil to trace the design onto your fabric. Then, secure the fabric in the hoop and start embroidering your design. Use different stitches such as satin stitch,backstitch,and French knots to bring your badge to life. Once you’ve finished embroidering, trim the excess fabric around the design and attach a pin or iron-on backing to make it easy to wear or display. Experiment with different colors and stitches to create unique and personalized embroidered badges that showcase your creativity and style.
Choosing the Right Materials and Tools for Your Project
To create your own embroidered badges, you will need to gather the right materials and tools before you start. Firstly,choose your fabric wisely. Opt for a sturdy and tightly woven material such as twill or felt, as they hold embroidery stitches well. Consider the size and shape of your badges when selecting the fabric to ensure it is indeed suitable for your design.
Next, select a variety of embroidery threads in different colors that match your design. It’s best to use embroidery floss or thread specifically made for embroidery to achieve the desired look. Additionally, you will need an embroidery hoop to hold your fabric taut while you work, as well as embroidery needles in various sizes to accommodate different thread thicknesses. Lastly, don’t forget to have a pair of embroidery scissors on hand to neatly trim excess thread.
| Materials: | Fabric (twill or felt) embroidery threads Embroidery hoop Embroidery needles Embroidery scissors |
Mastering Embroidery Techniques for Professional-Looking Badges
When it comes to creating professional-looking badges, mastering embroidery techniques is key. embroidered badges are a popular choice for adding a touch of elegance and sophistication to any garment or accessory. Here are some tips to help you create stunning embroidered badges that will impress everyone:
- Choose the right materials: Select high-quality embroidery thread and fabric to ensure your badges last a long time.
- Practice different stitches: Experiment with various embroidery stitches, such as satin stitch, chain stitch, and French knot, to add texture and dimension to your badges.
- Invest in the right tools: Use a good quality embroidery hoop, needles, and scissors to make the embroidery process easier and more precise.
By following these tips and practicing regularly, you’ll soon become a master at creating professional-looking embroidered badges that will elevate your projects to the next level.
Tips and Tricks for Finishing Touches and Adding Details
To create embroidered badges, start by choosing a design that you want to embroider onto your fabric. You can either draw the design yourself or use a pre-made template. Once you have your design ready, transfer it onto your fabric using a water-soluble stabilizer or tracing paper. This will help guide your stitching and ensure your design turns out accurately.
Next, thread your needle with embroidery floss in the colors of your choice. Use a satin stitch to fill in the design, making sure to cover all the lines entirely. You can also add additional details using other embroidery stitches such as the French knot or chain stitch for a more intricate look. Once you have finished stitching your design, carefully trim any excess fabric around the edges to create a neat finish. attach a backing to your embroidered badge using fabric glue or by stitching it on for a professional touch.Remember to take your time and enjoy the process of creating your very own embroidered badges to add a unique flair to your clothing or accessories.
Q&A
Q: How long does it typically take to make an embroidered badge?
A: the time it takes to make an embroidered badge can vary depending on the complexity of the design and the skill level of the embroiderer. In general, a simple badge can be completed in a few hours, while more intricate designs may take several days to finish.Q: What materials are needed to make embroidered badges?
A: To make embroidered badges, you will need embroidery thread, a fabric backing, an embroidery hoop, a needle, and a design template. You may also require scissors, a pencil or tailor’s chalk for tracing the design, and fabric glue or iron-on adhesive for attaching the badge to clothing or accessories.
Q: Can embroidered badges be made by hand or is a machine necessary?
A: Embroidered badges can be made by hand using traditional embroidery techniques such as satin stitch or backstitch. Though, a machine embroidery might potentially be used to create more precise and intricate designs quickly and efficiently.Q: What are some tips for beginners looking to make their own embroidered badges?
A: For beginners looking to make their own embroidered badges, it is helpful to start with simple designs and gradually work your way up to more complex patterns. Practice your stitching technique on a scrap piece of fabric before beginning your badge to ensure a clean and professional finish. additionally, be sure to secure the fabric backing firmly in your embroidery hoop to prevent puckering or distortion of the design.
Future Outlook
As I wrap up this article on how to make embroidered badges, I hope you feel inspired and excited to try out this fun and creative craft for yourself. Whether you want to customize your clothing, make personalized gifts for loved ones, or simply explore a new hobby, embroidery is a wonderful way to express your creativity.
Remember, practice makes perfect, so don’t be discouraged if your first few attempts don’t turn out exactly as you hoped. The beauty of embroidery is that it’s a constantly evolving skill that allows you to experiment and grow with each project.
So, gather your materials, let your inventiveness run wild, and get stitching! And who knows, maybe someday you’ll see your own embroidered badges proudly displayed on jackets, bags, or hats all around town. Happy stitching!