The idea of making challenge coins at home appeals to hobbyists, crafters, and small-group leaders who want to create personalized tokens without the expense of professional manufacturing. With the right tools, materials, and patience, it is possible to produce basic challenge coins in a home workshop. However, understanding both the possibilities and the limitations of do-it-yourself challenge coin production is essential before investing time and money in the project. At Metal Crafts Pro, we manufacture professional-grade challenge coins for organizations worldwide, and we frequently receive questions from individuals who have tried home methods before seeking our services. This guide provides a comprehensive overview of how to make challenge coins at home and when professional manufacturing becomes the better choice.
Understanding DIY Challenge Coin Methods
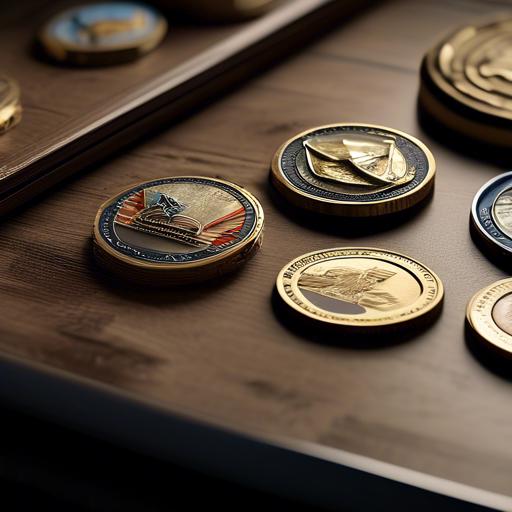
Creating metal challenge coins at home requires selecting one of several possible approaches. Each method offers different results in terms of appearance, durability, and production speed. The right choice depends on your skill level, available equipment, and the quantity of coins you need.
Method 1: Metal Blanks and Hand Engraving
The most traditional DIY approach involves starting with pre-cut metal blanks and adding designs through hand engraving or stamping. Metal blanks in brass, copper, and aluminum are readily available from jewelry supply companies in standard coin sizes, typically 1.5 to 2 inches in diameter.
To create designs using this method, you will need engraving tools such as rotary engravers, hand punches, or letter stamps. Rotary tools with diamond bits can carve designs into the metal surface, while metal stamps allow you to impress letters and simple symbols. This method demands considerable artistic skill and steady hands. Even experienced engravers find it difficult to achieve the crisp, uniform detail that professional die-stamping produces.
After engraving, the blanks can be plated using electroplating kits or chemical plating solutions. Home electroplating can apply thin layers of nickel, copper, or gold over the base metal. However, achieving even coverage and durable adhesion requires precise control of chemical concentrations, temperatures, and electrical current.
Method 2: Casting with Metal Molds
For those with some metalworking experience, casting challenge coins using sand casting or investment casting offers another DIY path. This process involves creating a mold from an original model, then pouring molten metal into the mold cavity.
Sand casting uses fine casting sand packed around a pattern to create a temporary mold. It is relatively inexpensive and accessible but produces rough surface finishes that require extensive cleanup. Investment casting, also known as lost-wax casting, yields much finer detail but requires specialized equipment including a kiln, vacuum chamber, and casting centrifuge.
Pewter and zinc alloys are popular choices for home casting because they melt at relatively low temperatures, typically between three hundred and four hundred degrees Celsius. Brass and bronze require significantly higher temperatures and more advanced equipment, making them less suitable for beginners.
Method 3: Etching and Chemical Milling
Chemical etching, also called photochemical machining, can produce detailed challenge coins from flat metal blanks. The process involves coating a metal blank with photoresist, exposing it to ultraviolet light through a printed transparency of your design, developing the resist, and then etching the exposed metal in an acid bath.
Ferric chloride is the most common etching solution for copper and brass. It is available from electronics suppliers and is relatively safe to handle with proper precautions. Etching produces recessed areas in the metal that can be filled with enamel paint to add color.
This method excels at reproducing detailed artwork and text, but it creates two-dimensional designs only. Unlike die-struck or cast coins, etched coins have uniform thickness and lack the raised relief that gives professional challenge coins their tactile quality.
Tools and Materials Required for Home Production
Regardless of which DIY method you choose, a significant investment in tools and materials is necessary. Here is a comprehensive list of what you will need:
- Metal blanks or casting stock: Brass, copper, zinc alloy, pewter, or aluminum in appropriate gauges or ingot form
- Cutting tools: Metal saws, shears, or a lathe for shaping blanks if not purchasing pre-cut discs
- Engraving equipment: Rotary tool with diamond bits, hand gravers, or pneumatic engraving system
- Stamping set: Metal letter and number stamps with a sturdy hammer and anvil or steel block
- Casting supplies: Crucible, melting furnace or torch, casting sand or investment powder, mold frames
- Etching chemicals: Ferric chloride or nitric acid solutions, photoresist, UV light source, developing chemicals
- Plating kit: Electroplating rectifier, plating solutions, anodes, cleaning solutions
- Finishing supplies: Sandpaper in multiple grits, polishing compounds, buffing wheels, clear lacquer or epoxy coating
- Safety equipment: Respirator, safety goggles, heat-resistant gloves, chemical-resistant apron, ventilation system
The total cost of these tools and materials can easily exceed several hundred dollars, and in some cases reach over a thousand dollars for high-quality equipment. For a small batch of coins, this investment may not be economically justified compared to professional manufacturing.
Limitations of Homemade Challenge Coins
While DIY challenge coin production can be a rewarding hobby, it is important to recognize the substantial limitations compared to professional manufacturing. These limitations affect appearance, durability, consistency, and scalability.
Detail resolution: Professional challenge coins are produced using hardened steel dies struck under tons of pressure. This process captures details measured in fractions of a millimeter. Home methods cannot replicate this level of precision. Hand engraving tends to be irregular, casting may lose fine features, and etching is limited to two dimensions.
Surface finish: Professional coins receive multiple polishing and plating stages that create mirror-smooth surfaces and perfectly even coatings. Home plating and finishing typically result in minor imperfections, color variations, and uneven textures that are visible upon close inspection.
Consistency: Manufacturing one or two coins at home is manageable, but producing ten, twenty, or fifty identical coins becomes extremely difficult. Slight variations in temperature, pressure, or technique cause noticeable differences between pieces. For organizations that need uniform coins for all members, this inconsistency is unacceptable.
Durability: Professional coins use high-quality base metals and plating layers designed to withstand decades of handling. Home plating is typically much thinner and more prone to wear, tarnishing, and chipping. Enamel colors applied by hand may not adhere as securely as factory-applied enamel.
Enamel and color: Applying enamel to recessed areas and baking it to a hard, durable finish requires industrial ovens and precise temperature control. Home attempts at enameling often result in bubbling, discoloration, or soft paint that chips easily.
Edge details: Professional coins can feature reeded edges, diamond-cut edges, rope edges, or custom edge text. Replicating these features at home is virtually impossible without specialized milling equipment.
When to Choose Professional Manufacturing
There are situations where DIY challenge coin production makes sense and others where professional manufacturing is clearly the superior choice. Understanding the boundary between these scenarios will save you time, money, and frustration.
DIY methods are appropriate when:
- You need only one or two coins as personal art projects
- You are a metalworking hobbyist who enjoys the process regardless of outcome
- Budget is extremely limited and you already own most necessary tools
- The coins are intended as rough prototypes to test design concepts
Professional manufacturing is the better choice when:
- You need ten or more coins for an organization or event
- Coins will be presented as official awards or membership tokens
- Design detail and professional appearance matter
- Coins need to match precisely across the entire order
- Recipients will carry coins daily in pockets or display them publicly
- You want enamel colors, plating, and edge details that last for years
Design Considerations for Challenge Coins
Whether you attempt a DIY project or work with a professional manufacturer, thoughtful design is the foundation of a great challenge coin. Good designs balance visual impact with manufacturing feasibility.
Keep text large and legible. Tiny letters become illegible on coins and are especially difficult to reproduce with home methods. Use strong contrast between raised and recessed areas. Avoid overly intricate details that may be lost during reproduction. Choose symbols and imagery that hold meaning for your organization and recipients.
Color selection also matters. If you plan to add enamel, limit your palette to three to five colors for the cleanest appearance. Too many colors create visual clutter and increase manufacturing complexity. Consider how your design will look in monochrome as well, since some recipients may prefer the classic look of uncolored metal.
Getting Professional Results from Metal Crafts Pro
If you have explored DIY methods and concluded that professional manufacturing is the right path for your challenge coins, Metal Crafts Pro offers everything you need. Our factory production capabilities overcome every limitation of home manufacturing while remaining surprisingly affordable.
We offer free professional design services, low minimum order quantities starting at just fifty coins, and a wide range of materials and finishes. Our quality control team inspects every coin before shipment, ensuring consistent detail, perfect plating, and durable enamel across your entire order. We also provide fast turnaround times, typically two to three weeks from design approval to delivery.
Conclusion
Learning how to make challenge coins at home is an interesting journey into metalworking, engraving, and casting. For hobbyists and artists, the process itself can be deeply satisfying. However, the limitations of home production in terms of detail, consistency, durability, and cost-effectiveness mean that most organizations will achieve far better results by partnering with a professional manufacturer.
Metal Crafts Pro combines advanced manufacturing technology with expert craftsmanship to deliver challenge coins that exceed expectations. Whether you need coins for a military unit, corporate team, police department, or nonprofit organization, we have the experience and capabilities to bring your vision to life. Skip the DIY frustrations and Request a Free Quote from Metal Crafts Pro today to see how affordable professional challenge coins can be.
Safety Considerations for Home Metalworking
DIY challenge coin production involves significant safety risks that hobbyists must address. Molten metal can cause severe burns. Chemical etching solutions are corrosive and toxic. Grinding and polishing generate metal dust that is harmful when inhaled. Electroplating requires electrical current and chemical baths that demand respect and preparation. Every year, amateur metalworkers suffer preventable injuries from inadequate safety practices.
Always work in well-ventilated areas with appropriate personal protective equipment. Fire-resistant surfaces, eye protection, and heat-resistant gloves are non-negotiable. Keep a fire extinguisher rated for metal fires nearby. Never work with molten metals or chemicals when alone. If you lack experience with these processes, seek training from experienced metalworkers before attempting challenge coin production. Your safety is worth far more than any coin you might create.
Alternatives to Fully DIY Coins
For those who want personal involvement without full DIY fabrication, hybrid approaches exist. Some manufacturers allow clients to submit hand-drawn designs that professionals translate into production-ready artwork. Others offer blank coins that individuals can hand-engrave or paint. These compromises preserve creative participation while leveraging professional manufacturing for structural quality.
Another alternative involves designing coins digitally using graphic software, then sending the files to manufacturers for production. This approach eliminates dangerous home fabrication while maintaining complete creative control over the final design. Many manufacturers welcome client artwork and provide guidance to ensure designs are optimized for their production methods. At Metal Crafts Pro, we regularly work with client-submitted sketches and concepts, refining them into manufacturable designs that retain the original creative vision.
Cost Comparison: DIY vs Professional Manufacturing
A realistic cost comparison often surprises DIY enthusiasts. Purchasing quality tools, materials, and safety equipment for home coin production typically costs five hundred to two thousand dollars for initial setup. Each additional coin requires more raw materials, chemicals, and time. For an order of fifty coins, the per-unit cost of DIY production often exceeds professional manufacturing prices while delivering inferior results.
Professional manufacturers benefit from economies of scale, purchasing metals and chemicals in bulk at wholesale prices. Their specialized equipment produces coins faster and more consistently than any home workshop. When you factor in the value of your time, professional manufacturing becomes the clear economic winner for all but the smallest personal projects. Additionally, professional coins come with quality guarantees and customer support that DIY efforts cannot match.