There’s something truly special about creating your own personalized keychain – a little piece of you that you carry with you everywhere you go. And what better way to make that keychain truly unique than by using resin to encapsulate your favorite colors, trinkets, or memories? In this article, I’ll guide you through the steps of making your very own resin keychain, so you can have a one-of-a-kind accessory that reflects your personality and style. Let’s get crafty!
Choosing the Right Resin and Molds for Your Keychain Project
To create a stunning resin keychain, it is crucial to select the right resin and molds for your project.The type of resin you choose will determine the overall look and durability of your keychain, while the mold will shape its design. Make sure to consider the following tips when selecting your materials:
- Resin Type: Epoxy resin is commonly used for keychain projects due to its clarity and durability. However,there are different types of epoxy resin available,such as UV resin or casting resin,each with its own unique characteristics.
- Mold Design: Choose a mold that complements the style of your keychain. From basic shapes to intricate designs, there are endless options available. Silicone molds are a popular choice for their adaptability and ease of use.
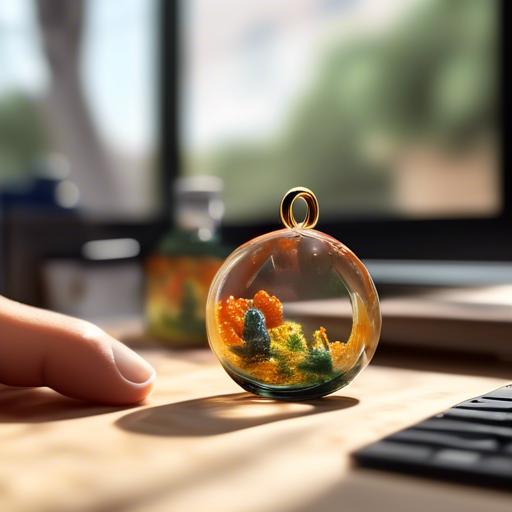
Adding Pigments and Decorative Elements for a Personalized touch
To add a personalized touch to your resin keychain, consider incorporating pigments and decorative elements into your design. You can mix in different colored pigments to create a unique and eye-catching look. Try experimenting with swirls, metallic effects, or even glitter to make your keychain stand out. You can also embed small charms, flowers, or other trinkets into the resin for added flair. The possibilities are endless, so let your creativity shine!
When adding pigments and decorative elements to your resin keychain, make sure to work in a well-ventilated area and follow safety precautions. Mix the pigments into the resin thoroughly to ensure even distribution of color.Consider using silicone molds to create different shapes and sizes for your keychains. Once the resin has cured, add a key ring and chain to complete your personalized accessory. Have fun experimenting with different techniques and designs to create a one-of-a-kind resin keychain that reflects your style and personality.
Proper Mixing and Pouring Techniques for Flawless Results
To achieve flawless results when making resin keychains, it is essential to follow proper mixing and pouring techniques. Before you begin, gather all the necessary materials: resin, hardener, keychain molds, mixing cups, stirring sticks, and any desired decorative items like glitter or dried flowers.
When mixing the resin and hardener, be sure to follow the manufacturer’s instructions carefully.Measure the components accurately using a digital scale to ensure the correct ratio. Stir the mixture slowly and consistently for at least two minutes to avoid creating air bubbles. Pour the resin mixture into the keychain molds slowly and gently to prevent spills and ensure even distribution. Allow the keychains to cure in a dust-free habitat for the recommended time before removing them from the molds.
Adding Finishing Touches and Keychain Hardware for Durability and Style
To add the finishing touches to your resin keychain, consider adding a layer of clear resin on top of your design. This will not only protect the design but also give it a shiny and professional look.You can also add glitter, beads, or dried flowers to your resin keychain for a unique and personalized touch.
When it comes to keychain hardware, opt for durable materials like metal key rings or lobster clasps. These will ensure that your keychain stays securely attached to your keys or bag. You can also add decorative charms or tassels to your keychain for added style and flair. Remember to attach the hardware before the final layer of resin dries to ensure a secure hold.
Q&A
Q: How do I start making resin keychains?
A: To start making resin keychains,you will need some resin,a keychain mold,pigments or dyes for color,and any additional decorations you want to add.
Q: Where can I purchase supplies for making resin keychains?
A: You can purchase resin, keychain molds, pigments, and other supplies at your local craft store or online.Q: How do I mix resin for my keychain?
A: Follow the instructions that come with your specific resin product, but generally you will mix a resin and hardener together in a 1:1 ratio.
Q: How can I add color to my resin keychain?
A: You can add color to your resin keychain by mixing in pigments or dyes before pouring the resin into the mold.
Q: What other decorations can I add to my resin keychain?
A: You can add glitter, beads, dried flowers, or any other small decorations to customize your resin keychain.
Q: How do I remove air bubbles from my resin keychain?
A: To remove air bubbles from your resin keychain, gently tap the mold on a flat surface or use a heat gun or lighter to carefully heat the surface of the resin.
Q: How long does it take for resin keychains to cure?
A: The curing time for resin keychains will vary depending on the brand and type of resin you are using, but typically it may take 24-72 hours for the keychain to fully cure.
Q: any tips for beginners making resin keychains for the first time?
A: Start with a simple design, follow the mixing instructions carefully, and have fun experimenting with different colors and decorations! Don’t be afraid to make mistakes, it’s all part of the learning process.
In Summary
I hope this article has inspired you to create your own lovely resin keychain. Remember, practice makes perfect, so don’t get discouraged if your first few attempts don’t turn out exactly as you hoped. Get creative, experiment with colors and designs, and most importantly, have fun with the process. Making resin keychains can be a truly rewarding and therapeutic hobby, and I hope you enjoy making them as much as I do. Thank you for reading, and happy crafting!

