As a lover of all things creative and crafty, making badges has become my latest obsession.There’s just something so satisfying about wearing a badge that you’ve made yourself. Not only does it give you a sense of pride in your craft, but it also allows you to personalize your accessories in a unique way. In this article, I’ll be sharing step-by-step instructions on how to make your own badges at home.So gather your supplies and let’s get crafting!
Choosing the Right Materials for Your badge
when it comes to making a badge, choosing the right materials is crucial to ensuring a high-quality and long-lasting result. Here are some key factors to consider when selecting materials for your badge:
1.Metal: Opt for a durable metal like brass or stainless steel for a professional and polished look. aluminum is a lightweight option for a more affordable badge.
2. Enamel: Enamel is a popular choice for adding color to badges. Consider soft enamel for a textured finish or hard enamel for a smooth,glossy look.
In addition to metal and enamel, you may also want to consider other materials like plastic or fabric for unique badge designs.Experimenting with different materials can help you create a badge that truly stands out and reflects your personal style or brand identity.
Exploring Different badge-Making Techniques
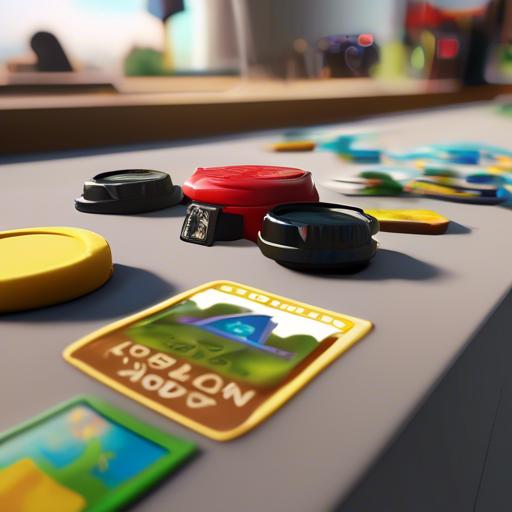
To create unique and eye-catching badges, there are various techniques that you can explore. One popular method is using a badge-making machine, which allows you to easily assemble badges with different designs and sizes. These machines typically come with all the necessary tools and materials, making the process quick and effortless.
Another technique to consider is hand-making badges using materials such as paper, fabric, or clay. This method allows for more creativity and customization, as you can experiment with different shapes, colors, and textures. By hand-making badges, you can also add personal touches like hand-drawn illustrations or handwritten phrases, making each badge truly one-of-a-kind. Let your creativity run wild and have fun exploring the endless possibilities of badge-making!
Personalizing Your Badge with Creative designs and Details
To create a unique badge that truly represents your personality or brand, consider customizing it with creative designs and details. You can add a touch of creativity by incorporating bold colors, intricate patterns, or even personalized text. Think about what makes you stand out and incorporate those elements into your badge design.
One popular way to personalize a badge is by adding unique details such as glitter, rhinestones, or charms. These embellishments can give your badge a more eye-catching and luxe look. Another option is to include a custom shape or size that fits your style or branding. Whether you prefer a round badge with a floral design or a rectangular badge with geometric patterns, the possibilities are endless when it comes to .
Adding a Pin or magnet Backing for Versatile Use
To make a badge more versatile, consider adding a pin or magnet backing. This simple addition can allow you to wear your badge in multiple ways and on different surfaces.Adding a pin or magnet backing is an easy DIY project that can be done with just a few materials.
Here’s how you can add a pin or magnet backing to your badge:
- Materials needed:
– Badge
- Pin back or magnet
- Glue
– Pliers
- Steps:
1. Begin by determining the best placement for the pin or magnet on the back of your badge.
2. Use the pliers to attach the pin back or magnet securely to the badge.
3. Allow the glue to dry wholly before using your badge with the new backing.
Q&A
Q: How can I make a badge?
A: Making a badge is easier than you think! All you need are some basic supplies and a little bit of creativity.
Q: What supplies do I need to make a badge?
A: To make a badge, you will need a badge making kit, which typically includes a badge machine, badge components (such as blanks and pins), and badge designs or images.
Q: Where can I find a badge making kit?
A: Badge making kits can be found at most craft stores, online retailers, or specialty badge making shops.
Q: Can I use any design or image for my badge?
A: Yes! You can use any design or image you like for your badge. Whether it’s a photo of your favorite pet, a funny quote, or a cool pattern, the possibilities are endless.
Q: how do I assemble the badge components?
A: Simply place your design or image in the badge blank, cover it with the clear plastic film, and use the badge machine to press everything together. attach the pin to the back of the badge.
Q: Are there any tips for making a badge?
A: One tip for making a badge is to make sure your design or image is the right size for the badge blank. Additionally,be sure to press the badge components together firmly to ensure a secure fit.
Q: How can I personalize my badge?
A: You can personalize your badge by adding embellishments, such as glitter, sequins, or stickers. You can also write a message or your name on the badge using a permanent marker.
Q: How long does it take to make a badge?
A: Making a badge typically takes just a few minutes from start to finish. Once you have your supplies and design ready, the assembly process is quick and easy.
Final Thoughts
As we come to the end of this guide on how to make a badge, I hope you have found the facts helpful and inspiring. Creating your own custom badges can be a fun and rewarding creative project that allows you to showcase your personality and passions. Whether you are making badges for a special event, as a gift, or just for yourself, remember to let your creativity shine through and have fun with the process. So gather your materials, get crafting, and show off your unique badges with pride! Thank you for reading and happy badge-making!