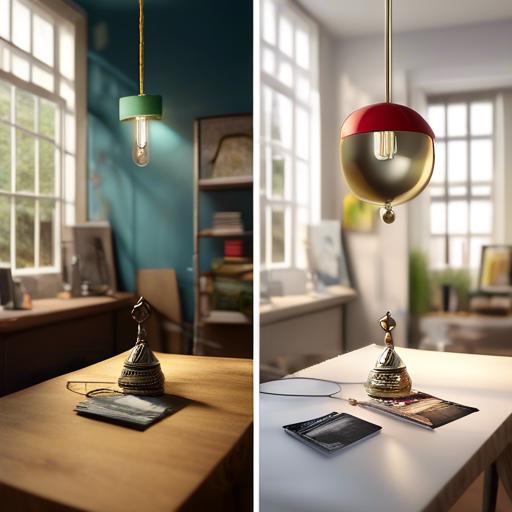
As I stood in my living room, admiring the cozy atmosphere created by my new plug-in pendant light, I couldn’t help but wonder how I managed to overlook such a simple yet impactful addition to my home decor for so long. Hanging a plug-in pendant light may seem like a daunting task, but with the right tools and a little know-how, you can easily transform any room in your home. In this article, I will guide you through the step-by-step process of how to hang a plug-in pendant light, so you too can bask in the warm glow of your own stylish creation.
Choosing the Right Location for Your Plug-in Pendant Light
When it comes to , there are a few key factors to consider. First and foremost, you’ll want to think about the purpose of the light. Is it meant to illuminate a specific area, such as a reading nook or bedside table? Or is it more decorative, meant to add ambiance to a room? Once you’ve determined the purpose, you can then consider where the best placement would be to achieve that goal.
Another important consideration is the proximity to an outlet. Since plug-in pendant lights require access to electricity, you’ll need to make sure that the location you choose is within reach of an outlet. If the nearest outlet is too far away,you may need to use an extension cord or hire an electrician to install a new outlet closer to your desired location. Additionally, think about the height at which you want to hang the light and whether there are any obstacles, such as furniture or doors, that could interfere with its placement.
Essential Tools and Materials for Installing a Plug-in Pendant light
To successfully hang a plug-in pendant light,you will need a few essential tools and materials. Here is a list of items you will need:
- Drill: To create holes in the ceiling for the hooks or screws.
- Screwdriver: To secure the hooks or screws into place.
- Tape Measure: To ensure the pendant light is hung at the desired height.
- Wire Cutters: to trim the excess wire length.
- Ladder: To reach the ceiling safely and comfortably.
In addition to the tools listed above, you will also need the following materials to install your plug-in pendant light:
- Pendant Light Kit: Make sure the kit includes the necessary hardware and instructions.
- Chain or Cable: to hang the pendant light from the ceiling.
- Lightbulb: Choose a bulb that fits the pendant light fixture and provides the desired amount of light.
- Ceiling Hook or Bracket: To securely attach the pendant light to the ceiling.
- Electrical Tape: To ensure a safe and secure electrical connection.
Step-by-Step guide to Hanging Your Plug-in Pendant Light
When it comes to hanging your plug-in pendant light, the process may seem daunting at first, but with the right steps, it can be a breeze. Start by gathering all the necessary tools and materials, including a drill, screws, a screwdriver, and of course, your pendant light. Make sure to measure the height at which you want the light to hang, ensuring it is centered above the area you want to illuminate.
Next,locate a stud or use a wall anchor to secure the mounting bracket in place. Attach the bracket securely to the ceiling, making sure it is level. Then, hang the pendant light from the bracket, ensuring all the wires are connected properly. plug in the light and enjoy the warm glow it brings to your space. With these simple steps, you can easily hang your plug-in pendant light and transform the ambiance of any room in your home.
Safety Tips and Final Adjustments for Your Plug-in Pendant Light Installation
for the final adjustments of your plug-in pendant light installation,make sure to follow these safety tips to ensure a secure and long-lasting setup:
- Double-check all electrical connections to avoid any potential hazards.
- Ensure that the pendant light’s cord is properly secured and not in a position where it can be easily pulled or tripped over.
- test the light fixture to make sure it is working correctly before hanging it in its final position.
Additionally, consider these final adjustments to enhance both the functionality and aesthetic appeal of your plug-in pendant light:
- Adjust the height of the light to ensure proper illumination for the intended area.
- Use a dimmer switch to control the brightness of the pendant light, allowing you to create the desired ambiance in the room.
- Add decorative elements such as a cord cover or decorative canopy to give your pendant light a polished and finished look.
Q&A
Q: What tools do I need to hang a plug-in pendant light?
A: You will need a drill, screws, wall anchors, a screwdriver, and possibly a stud finder.
Q: How do I find the right spot to hang my pendant light?
A: choose a spot on the ceiling where you want to hang the light and use a stud finder to locate a stud for added support.
Q: Can I hang a plug-in pendant light on any type of ceiling?
A: Yes, you can hang a plug-in pendant light on any type of ceiling, but you may need to use different tools or techniques depending on the ceiling material.
Q: How do I install the ceiling hooks for the pendant light?
A: Use a drill to make pilot holes for the hooks, insert wall anchors if necessary, and then screw in the hooks securely.
Q: How do I hang the pendant light from the ceiling hooks?
A: Simply loop the cord of the pendant light over the hooks and make sure it is securely in place before plugging it in.
Q: Is it safe to hang a plug-in pendant light on my own?
A: Provided that you follow the manufacturer’s instructions and take proper safety precautions, it is indeed safe to hang a plug-in pendant light on your own.
Concluding Remarks
hanging a plug in pendant light is a simple and rewarding DIY project that can instantly transform the ambiance of a room. By following the steps outlined in this guide, you can easily add a stylish and modern touch to your living space without the need for extensive electrical work. So why wait? Get started on your lighting makeover today and enjoy the cozy glow of your new pendant light!