Hey there, crafty friends! Are you looking to add a personalized touch to yoru fridge with some unique and handmade magnets? Well, look no further! In this article, we’ll show you how to make adorable clay magnets that are not only easy to create but also totally customizable to fit your style. So grab your clay, some paint, and let’s get crafting!
Gather Your Supplies for a Fun DIY Project
To create your own clay magnets for teh fridge, you will need to gather a few simple supplies. Here is a list of what you will need:
- Clay: Choose your favorite colors to create unique and colorful magnets.
- cutting tool: A sharp knife or clay cutter will help you shape the clay into desired designs.
- Magnets: Small, round magnets that will be attached to the back of the clay for easy fridge placement.
- Rolling pin: To roll out the clay and create a smooth surface for your designs.
Onc you have all your supplies ready, you can begin shaping and molding the clay into fun and creative designs. Let your imagination run wild as you create unique magnets that will add a personal touch to your fridge. Don’t forget to bake the clay according to the package instructions to ensure your magnets stay sturdy and durable. Create a whole set of clay magnets to decorate your fridge or give them as a thoughtful handmade gift to friends and family. Let your creativity shine with this fun and easy DIY project!
Simple Steps to Create Your Own Clay Magnets
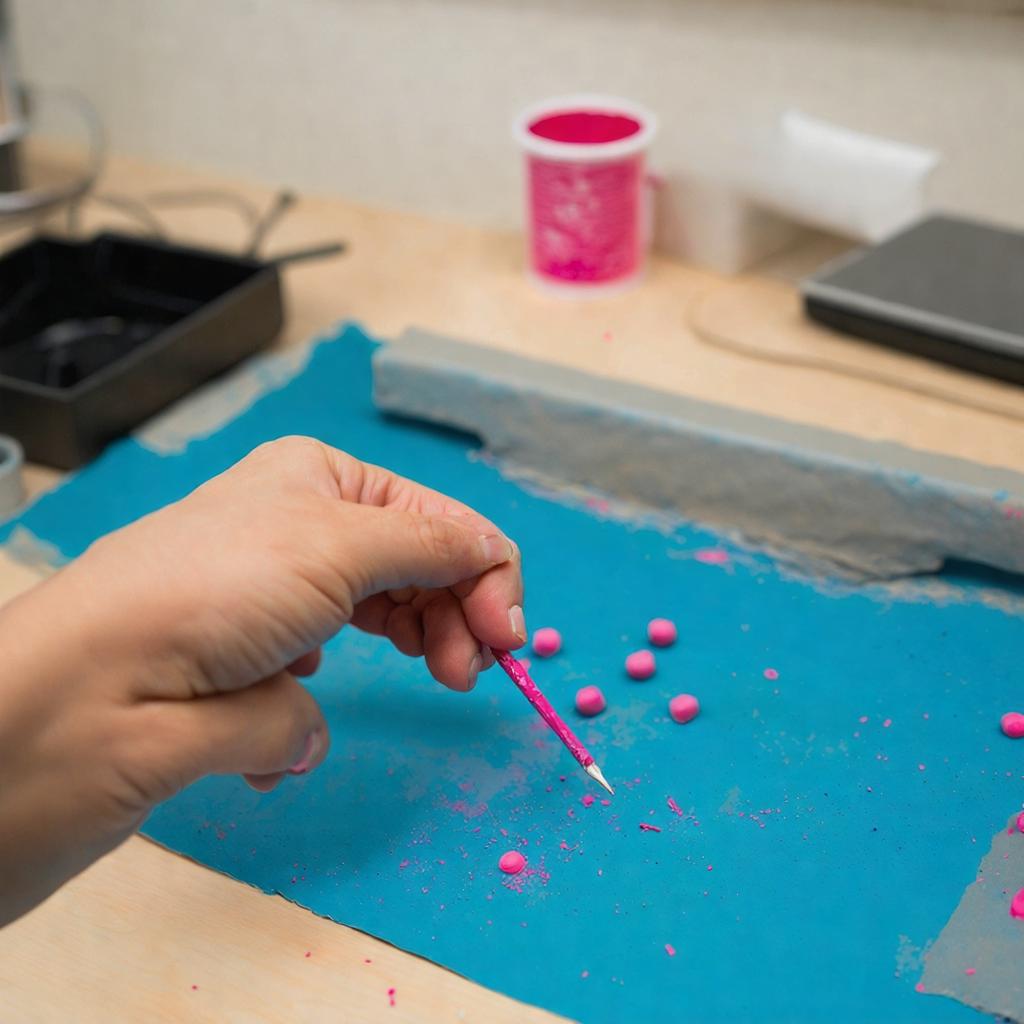
To create your own clay magnets for the fridge, you only need a few simple materials and some creativity. Here are the easy steps to follow:
First, gather your supplies. You will need air-dry clay, cookie cutters or molds, acrylic paint, paintbrushes, magnets, and super glue. Make sure to choose a clay color that you like and that will look nice on your fridge.
Next, roll out the clay to your desired thickness and use the cookie cutters or molds to create your shapes. You can make simple shapes like hearts,stars,or animals,or get creative and make unique designs.Let the clay dry wholly before moving on to the next step.
Once the clay shapes are dry, paint them with acrylic paint in whatever colors you choose. You can add designs, patterns, or even write words on the magnets. Let the paint dry completely before attaching the magnets.Use super glue to adhere the magnets to the back of the clay shapes. Allow the glue to dry completely before placing your new clay magnets on the fridge. Now you have your own personalized magnets to add a touch of fun and personality to your kitchen decor!
Tips for Decorating and Personalizing Your Magnets
One fun and creative way to personalize your magnets is by making handmade clay magnets for your fridge. Using air-dry clay, you can mold different shapes and designs to match your personal style. Here are some tips to help you make your own unique clay magnets:
Materials Needed:
- Air-dry clay
- Rolling pin
- Cookie cutters or molds
- Acrylic paint
- Paintbrushes
- Magnets
- Hot glue gun
Steps to Make Clay Magnets:
- Roll out the clay to your desired thickness.
- Use cookie cutters or molds to create shapes, or simply mold the clay with your hands.
- Let the clay dry completely before painting.
- Paint your designs on the clay and let them dry again.
- Attach magnets to the back of the clay shapes using a hot glue gun.
- Voila! You now have custom clay magnets to decorate your fridge with.
Show Off Your Artistic Creations on Your Fridge
To make clay magnets for your fridge, you will need some basic supplies and a little bit of creativity. First, gather some air-dry clay, cookie cutters in various shapes, acrylic paint, paintbrushes, strong magnets, and a rolling pin.Next, roll out the clay to your desired thickness and use the cookie cutters to cut out different shapes. Let the clay shapes dry completely before painting them with your favorite designs. Once the paint has dried, glue a strong magnet to the back of each clay shape. Voila! You now have custom clay magnets to . display your unique designs proudly and add a pop of color to your kitchen decor with these fun and easy DIY magnets.
Q&A
Q: What supplies do I need to make clay magnets for my fridge?
A: To make clay magnets for your fridge, you will need air-dry clay, small rubber or silicone molds, magnets, acrylic paint, paintbrushes, and a rolling pin.
Q: How do I make clay magnets for my fridge?
A: First, roll out the clay to your desired thickness. Press the clay into the molds and allow it to dry completely. Once dry, paint the clay magnets with acrylic paint and attach a magnet to the back using strong glue.Q: Can I personalize my clay magnets?
A: Absolutely! You can customize your clay magnets by painting them with different colors,patterns,and designs. You can also add embellishments like glitter or small beads for a unique touch.
Q: How long does it take for the clay magnets to dry?
A: It typically takes 24-48 hours for air-dry clay to fully dry and harden. Be patient and check the magnets periodically to ensure they are completely dry before painting them.
Q: Are there any safety precautions I should take when making clay magnets?
A: Remember to wash your hands thoroughly after handling the clay and paint. Make sure to work in a well-ventilated area when painting and avoid inhaling any fumes. Keep small children and pets away from the materials to prevent ingestion.
Q: Where can I find inspiration for my clay magnets?
A: You can find inspiration for your clay magnets by browsing online craft tutorials, visiting local craft stores for ideas, or even looking at Pinterest for creative magnet designs. Let your imagination run wild!
Concluding Remarks
And there you have it, folks! A fun and creative way to liven up your fridge with handmade clay magnets. Whether you choose to make them for yourself or as a thoughtful gift for a friend,this DIY project is sure to bring a smile to your face every time you reach for that carton of milk. so gather your supplies, get your hands dirty, and let your imagination run wild as you create your very own one-of-a-kind clay magnets. Happy crafting!

